Getting Started Tutorial - Jupyter Notebook
In this tutorial, we will run a Python Jupyter Notebook on FloydHub. Notebooks allow you to create and share documents that contain live code, visualizations and explanatory texts. This is an example Notebook. It is great for interactively writing and debugging your code and visualizing your results and data.
Similar to the Quick Start guide, we will train a CNN model for handwritten digit recognition using PyTorch and the MNIST database.
If you are new to FloydHub, please ensure you have followed the Quick Start guide first. It introduces some important concepts used in this tutorial.
What we will accomplish in this guide
- Learn how to create a new project on FloydHub
- Start a Jupyter notebook on FloydHub's GPU server
- Interactively run and debug your code
- Mount datasets to use in your code
Quick preparation checklist
- You must have a FloydHub account
- You must have
floyd-cliinstalled on your computer - You must log in to FloydHub through the CLI
Setup
Create a new project
For this tutorial, we will create a new Project. This project will be a collection of the jobs you run and their data, logs and results.
To create a new Project, visit www.floydhub.com/projects and click on the "New Project" button on the top right hand corner.
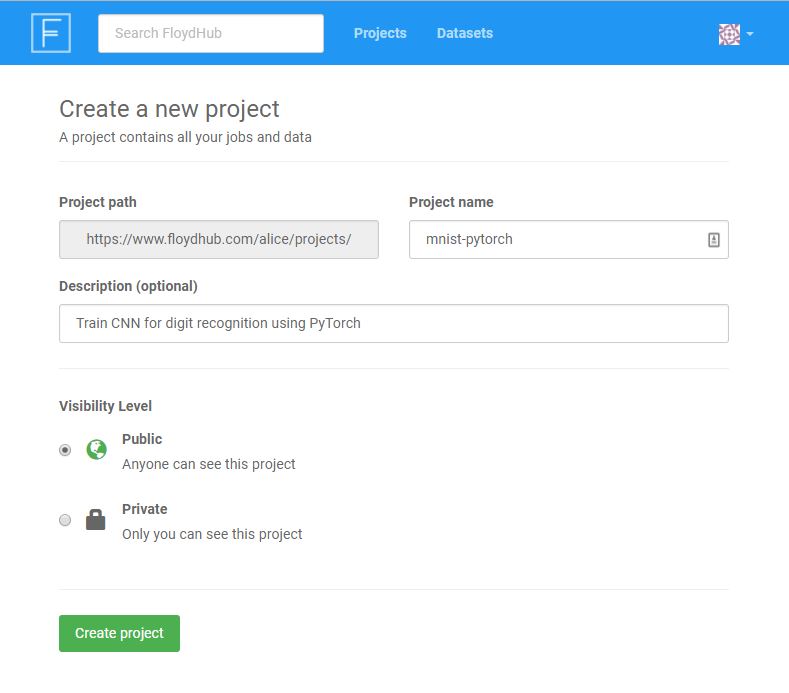
We will name this project mnist-pytorch. Feel free to provide an apt description.
The Visibility field indicates who can see your project. If you set it to Public, anyone can see your project, your code and data. If you are working on an open source project, this is a great way to share and contribute to the FloydHub community. If your code or data is proprietary, please select Private. This will ensure that only you and your team will have access to this project.
Get the code
We will clone the quick-start repository from Github to your local machine and run it on FloydHub. Run the git clone command in a brand new directory on your computer:
$ git clone https://github.com/floydhub/quick-start-pytorch.git
Cloning into 'quick-start-pytorch'...
$ cd quick-start-pytorch
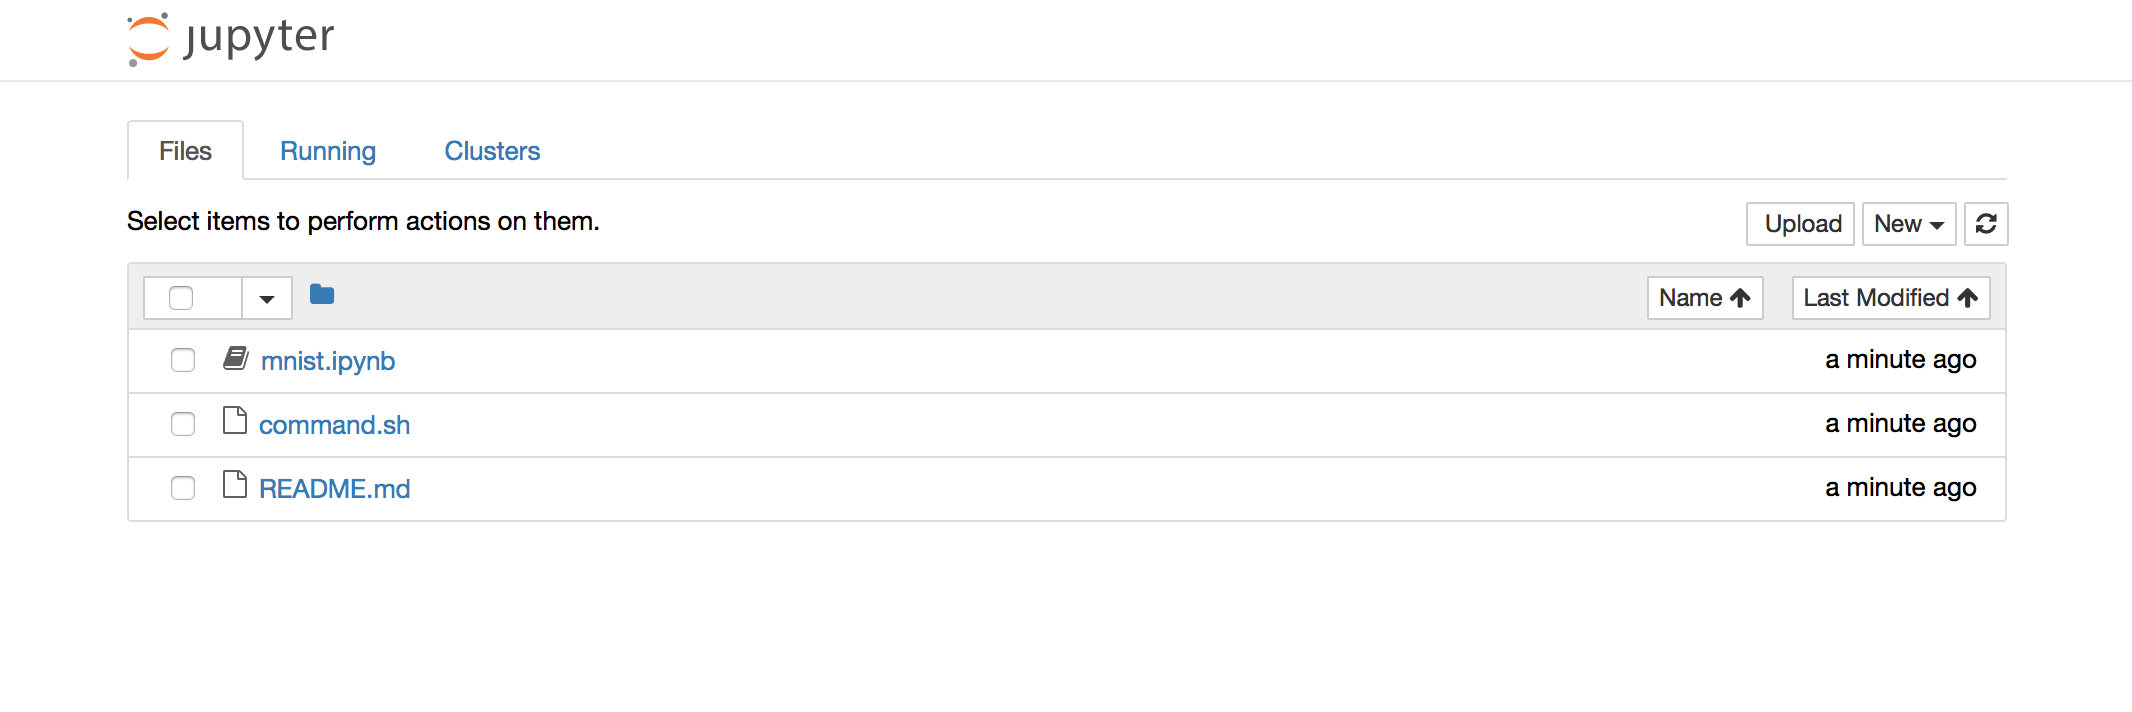
$ ls
$ README.md mnist.ipynb
In this guide, we will use the mnist.ipynb Jupyter Notebook.
Initialize new project
Now that we have the code, we want to associate this directory with the new project you just created on FloydHub. Ensure that you are inside the quick-start-pytorch directory and execute:
$ floyd init mnist-pytorch
Project "mnist-pytorch" initialized in the current directory
This tells Floyd that all the jobs run from this directory belong to the same project.
Running Jupyter Notebook on FloydHub
Starting a Jupyter Notebook on FloydHub is very simple. Use the floyd run command with --mode jupyter flag.
Execute the following command from the command line:
$ floyd run --mode jupyter --gpu --env pytorch-0.2
Creating project run. Total upload size: 21.9KiB
Syncing code ...
[================================] 23333/23333 - 00:00:00
NAME
--------------------
mckay/projects/mnist-pytorch/2

Setting up your instance and waiting for Jupyter notebook to become available ..............

Path to jupyter notebook: https://www.floydhub.com/notebooks/pCoPyzZtYeo6mE9PpSWsmY
This will take a little bit. As it executes, Floyd is doing the following behind the scenes:
- Sync your local code to FloydHub's server
- Provision a GPU instance on the cloud (if you want CPU, drop the
--gpuflag) - Set up an deep learning environment with PyTorch installed (because
--env pytorch) - Start a Jupyter server on the cloud, and open the url in your browser
You can also open the link to the your Jupyter dashboard using the displayed URL. For example:
Open the mnist.ipynb Notebook and start training your model interactively!
Next steps
Check the status of your job
You can view the job's status by going to the job's page in the web dashboard:

Alternatively, you can view the status from your terminal using the
floyd status command:
$ floyd status mckay/mnist-pytorch/projects/2
JOB NAME                          CREATED         STATUS      DURATION(s)  INSTANCE    DESCRIPTION
----------------------            --------------  --------  -------------  ----------  -------------
mckay/mnist-pytorch/projects/2    16 minutes ago  running               0  gpu
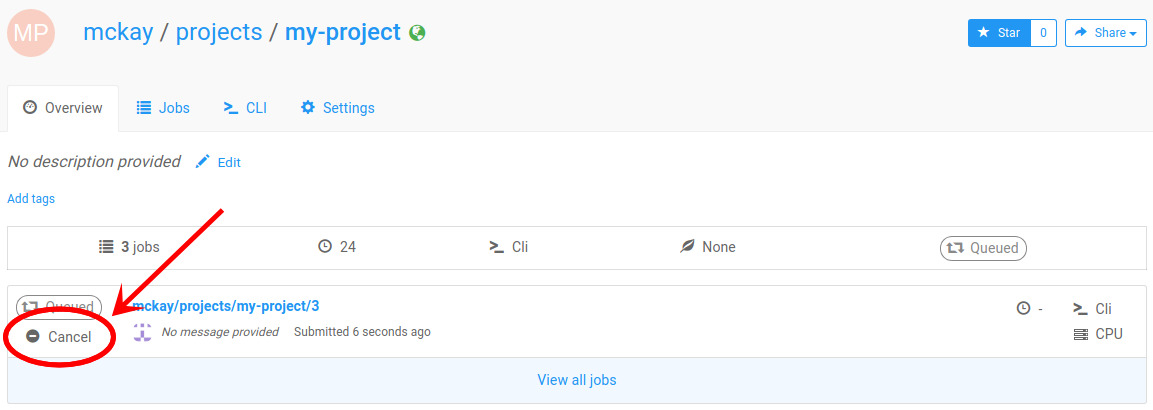
Stopping your Notebook
On the project page, click the Cancel button below the icon that shows the status of your job, as shown in the picture below:
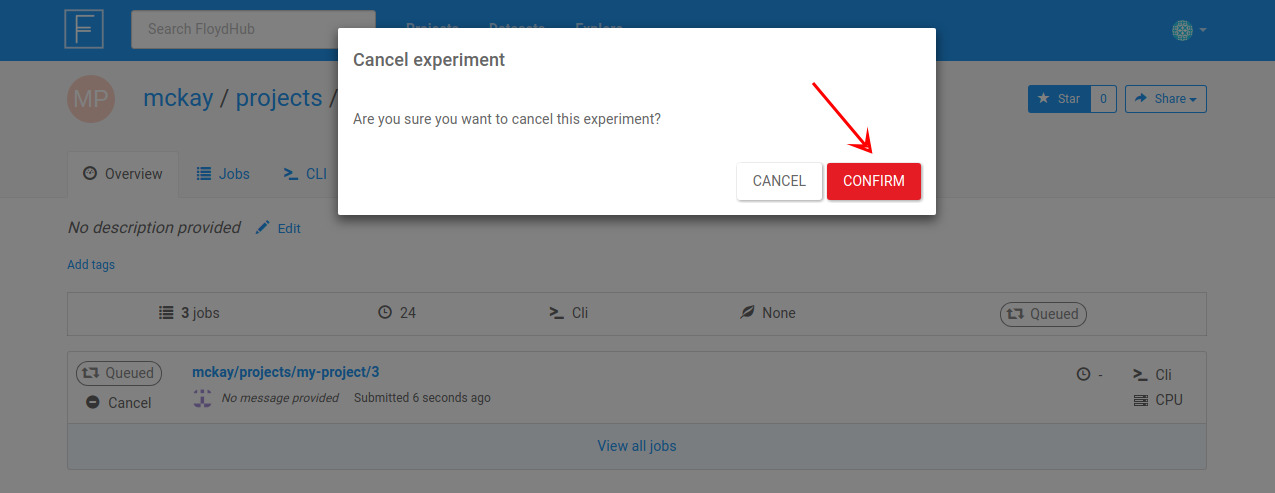
Then click the Confirm button in the modal that pops up:
Warning
Jupyter Notebooks are designed for interactive development. Your job starts running on FloydHub's server when you execute the floyd run --mode jupyter command and it continues to be active till you explicitly stop your job.
Hence, even if you are not actively executing code inside your Notebook, the Jupyter server is still active on FloydHub and you are billed for the time.
Learn More
For a more in-depth tutorial about FloydHub that uses FloydHub's "command mode", check out this tutorial.
Help make this document better
This guide, as well as the rest of our docs, are open-source and available on GitHub. We welcome your contributions.
- Suggest an edit to this page (by clicking the edit icon at the top next to the title).
- Open an issue about this page to report a problem.